TL;DR # A Python script that identifies every device on your network in PAN-OS traffic logs, without Active Directory. Combines Pi-hole DNS, UniFi Controller, and DHCP leases into one priority merge. 124 devices named on my PA-440.
Before:
1 2 3 192.168.10.128 → 8.8.8.8 user: unknown 192.168.30.240 → 1.1.1.1 user: unknown 172.30.50.77 → 52.26.132.60 user: unknown After:
The 2 AM Wake-Up Call # I woke up to find my CI/CD platform had been down for 8 hours. Semaphore, the Ansible automation engine that manages my entire homelab, was stuck in a crash loop:
1 2 3 /usr/local/bin/server-wrapper: line 295: syntax error: unexpected "&&" /usr/local/bin/server-wrapper: line 295: syntax error: unexpected "&&" /usr/local/bin/server-wrapper: line 295: syntax error: unexpected "&&" The same error, repeating every few seconds. The container would start, hit the broken entrypoint script, crash, and restart. Endlessly.
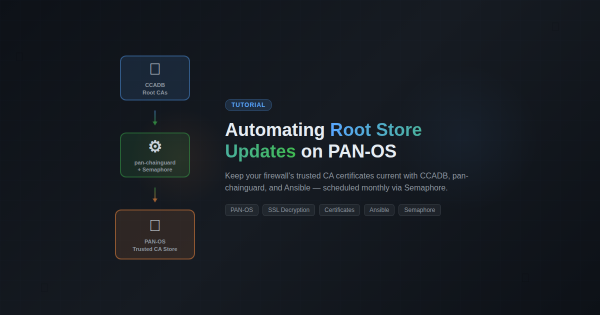
Overview # If you’re running SSL decryption on a Palo Alto firewall, you’ve probably hit this: a user reports they can’t access a website, and it turns out the site’s CA certificate isn’t in your firewall’s trusted root store. PAN-OS only updates its built-in root store on major software releases, which means between upgrades your firewall’s trust anchors slowly go stale.
Overview # DNS is the backbone of your network. When your Pi-hole goes down, every device in your home loses internet access. Websites won’t load. Apps stop working. Smart home devices go offline. It’s a single point of failure that brings everything to a halt.
This tutorial shows you how to build a resilient DNS infrastructure using two Pi-hole servers with automatic failover. If one server dies, the other seamlessly takes over in under 15 seconds — without any manual intervention.
The Challenge # I’ve been running a homelab for years, constantly deploying new services, debugging issues, and learning from mistakes. Every time I solve a particularly gnarly problem or build something interesting, I think, “I should write this up.” And then I don’t.
The friction is real. By the time I finish a project—maybe deploying Wazuh XDR or migrating from Watchtower to WUD—I’m mentally done. The last thing I want to do is sit down and reconstruct what I did, sanitize my internal network details for public consumption, and format everything into a proper blog post. The motivation is there when I’m in the middle of solving a problem, but it evaporates the moment I’m done.
Why an XDR in a Homelab? # When I first started building out my homelab infrastructure, I fell into the same trap that catches most homelab enthusiasts: I assumed that being behind a firewall made me safe. After all, I wasn’t running a Fortune 500 network. I had VLANs, I had a next-generation firewall doing deep packet inspection, and I kept my systems patched. What more did I need?
The Challenge # I needed a unified security monitoring solution that could:
Provide endpoint detection and response (XDR) capabilities Integrate with my existing Graylog centralized logging infrastructure Scale from a single-node deployment to multi-node if needed Work with my existing OpenClaw threat intelligence feeds The Solution # Wazuh Single-Node Stack # Deployed Wazuh as a Docker-based single-node stack. The single-node architecture includes:
The Challenge # I watched a YouTube video titled “I Stopped Using PowerPoint Once I Learned This Claude Method” that demonstrated creating presentations using HTML instead of PowerPoint. The approach was compelling: single HTML files that run in browsers, support full CSS animations, and can be deployed to GitHub Pages for instant sharing.
But here’s the thing - I already had a pptx skill installed that generates actual PowerPoint files. Should I replace it? Enhance it? Or build something new?
Overview # Your password vault is arguably the most sensitive service in your homelab. Exposing Vaultwarden to the internet requires layered protection. This tutorial shows how to add Cloudflare Proxy (WAF, DDoS protection, bot management) in front of Vaultwarden while preserving real client IP logging.
What you’ll achieve:
1 2 3 4 5 6 7 8 9 Client (real IP) ↓ Cloudflare Edge (WAF, DDoS, Bot protection) ↓ CF-Connecting-IP header Your Firewall (geo-blocking, threat intel) ↓ Caddy (extracts real IP, TLS termination) ↓ X-Real-IP header Vaultwarden (rate limiting, 2FA, logs real IP) Prerequisites # Vaultwarden already running behind Caddy reverse proxy Domain managed by Cloudflare (DNS) Caddy with valid TLS certificates (Let’s Encrypt/ACME) Basic understanding of reverse proxies The Problem # When you enable Cloudflare Proxy (orange cloud), traffic flows through Cloudflare’s edge servers before reaching your origin. This provides excellent protection, but introduces two challenges:
Overview # I migrated my internet speed monitoring from Speedtest Tracker to MySpeed after learning that Speedtest Tracker was deprecating native Discord notifications. Rather than adding an Apprise sidecar container for notifications, I opted for MySpeed which has built-in Discord support.
Why Migrate? # Factor Speedtest Tracker MySpeed Stack Laravel/PHP Node.js Discord Deprecated (needs Apprise) Native support Complexity nginx + php-fpm + SQLite Single Docker container Updates Manual WUD opt-in monitoring Architecture Comparison #